Sarah is a student, a CompuServe buddy, and an avid reader who's been of invaluable assistance to countless writers with her inquisitive mind and her insights for fiction. She's also a Windows user amongst a whole group of Mac people, and a Scrivener lover herself- which makes her the perfect person to write a post for us talking about Scrivener for Windows, from the perspective of someone who uses it for non-fiction writing.
So, without further ado, I give you Sarah!
Introduction
I started using the first ever beta version of Scrivener for Windows after Claire's blog post here, and all her praise of the Scrivener for Mac software.
Literature and Latte had just started with the beta versions for Windows then, so it was the perfect time to discover Scrivener. I could try it out for more than the regular 30-days-trial, to see if I really liked it and if it was the right program for my non-fiction writing.
And of course did I like it, even if I learned fast that the beta versions weren’t quite as great as the Scrivener Claire described
And since the operating systems have differences as well, some things are done differently or are named differently in Windows as opposed to Mac.
I'd like to give you an overview of these differences here, along with a demonstration of how one can use it for non-fiction writing, because that's what I use Scrivener for.
You might notice in some of the screen shots that my Scrivener is pretty colourful. I like working with colours, and in addition to that, the colours help me to organise and keep track of all the files.
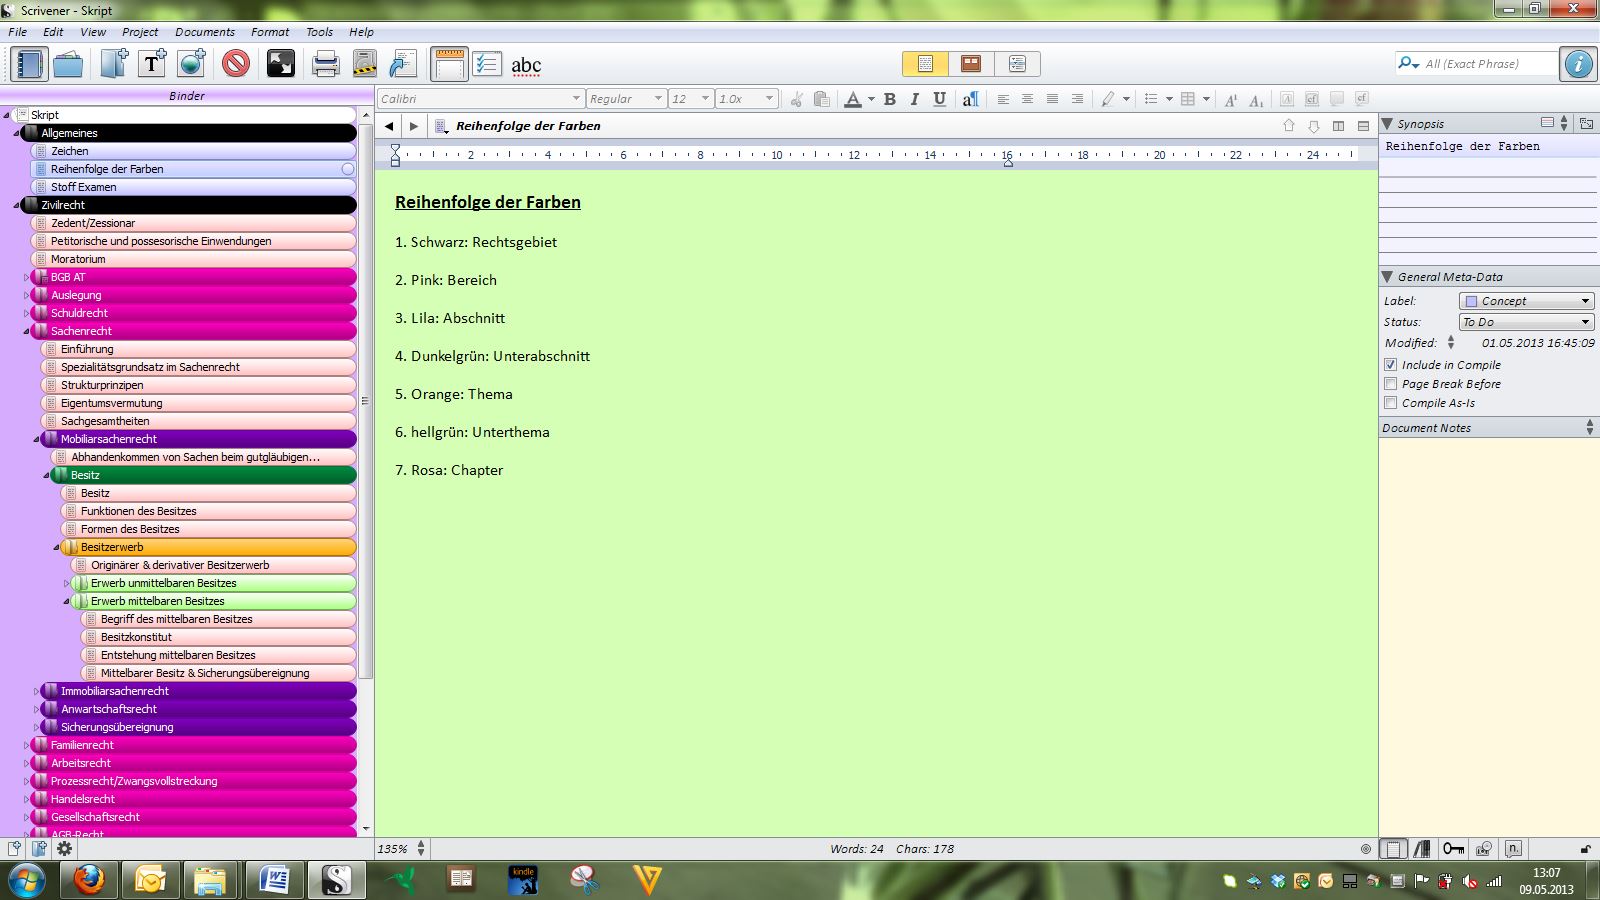

And I'm sorry if some of the screen shots are a bit confusing with all the German text :-), but now on to the descriptions themselves.
Starting a project
The first beta versions of Scrivener for Windows didn't have templates yet, so I started with a blank project.
And through time, I learned that this is the best way for me anyway. I tried out the non-fiction templates and even the fiction-templates but none of them have quite the right settings for me.
So even now with all the different templates, I start every new project with the blank template and create my own settings or import them from previous projects.
How to import Word documents/ other documents into Scrivener
You can import existing documents or files into Scrivener, but where in Scrivener you can import it depends on what kind of file it is.
Every type of text document, including .rtf files or .doc/.docx files, can be imported directly into the Draft folder.
.pdf files or pictures can only be imported into the Research folder.
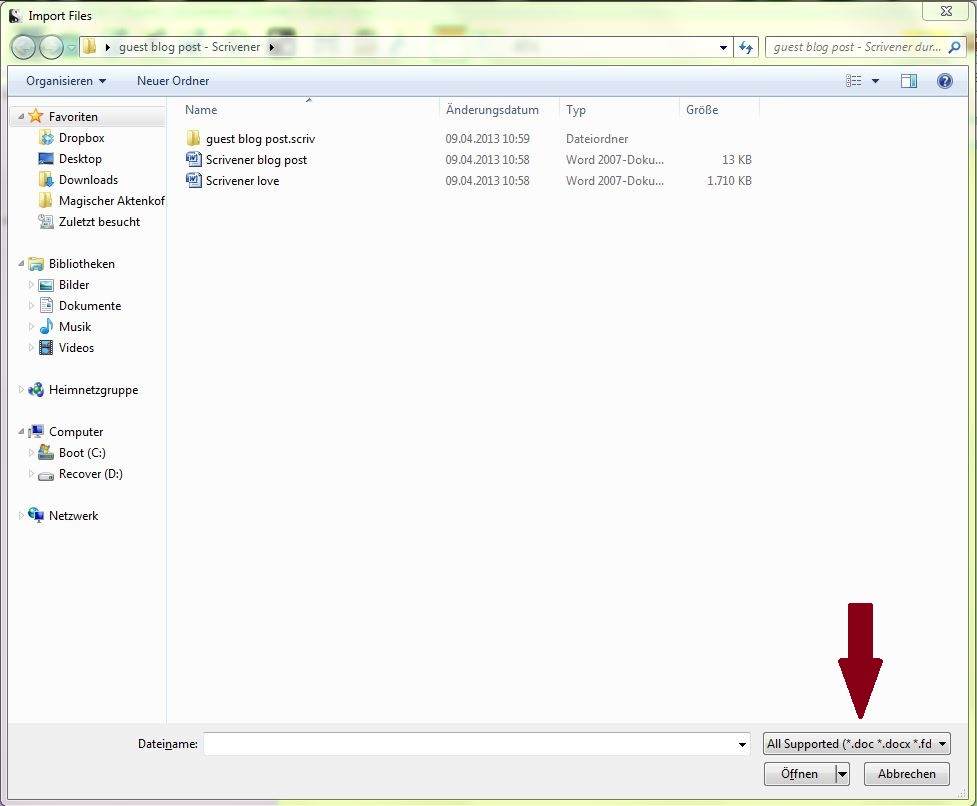
To import the files, go up to File, and from there to Import, or hit _ctrl+shift+j_. You can then choose the folder from where you want to import, and the file(s). Click Open to import the file(s).
If your focus is on the Draft folder when you import files, the window only shows the import supported files (see screen shot).
When your focus is on the Research folder, all documents are shown in the window.
The imported files will show up in the binder as new documents.
How to export out of Scrivener
You can export your complete draft from Scrivener or just individual documents.
There are two ways to export individual documents out of Scrivener to anywhere on your computer.
First way
Click on File, and choose Save As there, or press _ctrl+shift+s_. Scrivener opens a window where you can choose where you want to save that file and in which format.
Click Save when you have everything selected.

Second way
Click on File, and choose Export, then Files- or press _ctrl+shift+x_.

In my experience, sometimes it works better to choose the second way. With some documents the formatting got weird after I used the "Save As" way, so I would recommend using the second way.
Back up things to Dropbox
Nothing is more important than backing up your stuff. You can back up your writing in two different ways.
Here are the two ways for backing up to Dropbox:
First:
- click Fileand then click Okay.
- choose Back Up
- choose Back Up To
- click Browse to select your own Dropbox folder
Second:
- click Tools, and there choose Options (or press “f12”)
- click on Backup in the left column
- select the options you like and then choose your Dropbox folder
- click first Apply and then Okay.
How to get Index cards with a picture
When you view your documents on the card board or in the inspector, you can have the cards show an image to reflect the document or a synopsis.
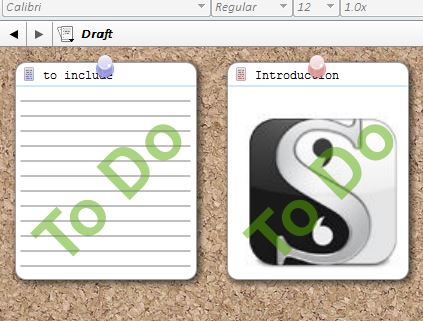
To change between these two views, open the Inspector (_ctrl+shift+I_ or click on the blue Inspector button in the right upper corner) and click on the two arrows over another, and choose the image icon or the text field icon.
If you select the image icon, you see the option "Drag an image here".
You can now drag an image from anywhere on your Computer to there and it will show as the image on the index card.
Editing comments and footnotes
At the moment there is a little glitch in the Scrivener for Windows system, and the editing of comments and footnotes is a bit more complicated than it should be.
Normally one expects that for editing, you should just have to click on the comment or footnote and you'll then be able edit it.
But it doesn't work exactly like that right now.
To edit a comment/ footnote, click once on the comment/ footnote in the text or in the Inspector. Now you have moved the focus there. After this you can double-click the comment/ footnote and get the cursor there to edit it.
To leave the comment/ footnote, just press Esc, and you are back in the text.
Missing things
The things that are still missing from the Scrivener for Windows but are included in Scrivener for Mac are:
- The reading of text out loud through ScrivenerAnother thing that sadly isn't possible yet is setting different languages/ dictionaries for different projects. If you write in different languages in different projects, you have to change the dictionary every time. After changing the dictionary, I suggest doing a restart, even if Scrivener doesn't prompt you to, because some times the change doesn't work or doesn't work completely. I had it happen that my personal word list wasn't working, if I just changed the dictionary without a restart afterwards.
- Automatic snapshots (taken when you close the Project file to back it up in the Mac version)
- To be able to open research in pop-ups
Shortcuts and how to change them
Here is a list of some shortcuts I use often and find very helpful.
- Move focus between the binder and editor: “shift+tab”What I like especially is that you can create your own shortcuts. You can choose them in the options (“f12”) under “keyboard”. Select the shortcut you want to change and at the bottom you see the key sequence. Just click in the text field or the “X” behind it or on the “reset" button. Then press the key sequence you'd like to have, and it will show in the text field. If the text is red, this key sequence is already for another shortcut and you have to use something else. If the text is black, you can click “apply”. When you are finished with changing the shortcuts, just click “okay”.
- Add a new document: “shift+n”
- Add a new folder: “ctrl+shift+n”
- Move a document to the trash: “shift+delete”
- Scrivener manual: “f1”
- Options: “f12”
- Copy: “ctrl+c”
- Paste: “ctrl+v”
- Paste and match style: “ctrl+shift+v”
- Learn Spelling: “ctrl+g, l“
- Undo “ctrl+z“
- Redo “ctrl+y"
- Save “ctrl+s”
- Lock/ unlock Editor: “ctrl+shift+L”
Conclusion
Scrivener has made my student life much easier and much more organised. I don't know what I would do without it.
One thing I'd especially like to praise: the support you get from the Literature and Latte team in the forum and through the email support. They are so fast at finding solutions for your problems that you don't have to worry long; sometimes no time at all.
For example, I couldn’t open one of my projects the other day. It was the big one in which I have all my studies. I went to the forum and posted a message with the problem and everything I tried.
Within a few hours I got the solution with a step-by-step explanation how to do it.
In addition to the fast help, I also learned to pay more attention through this experience :-) The problem was that when I closed that specific project the last time, I must have had a bunch of files opened in Scrivenings (which is a way of opening several files at once, and having them all together with separators in the editor). When I tried to open that project the next time, Scrivener was trying to load all these files at once, and that was too much and caused the freeze and shutdown.
I've used the email support for other things before as well and have always got an answer in 24-48 hours.
All the answers I got in the forum and through the email support were never pre-formulated standard answers, but individual answers to my questions.
I never experienced such great support anywhere else.
Thank you Claire, for your help with this post and to the rest of All the World's Our Page writers for letting me write the guest post :-)
Sarah Meral
#
And thank you very much, Sarah, for all your work on this- we really appreciate seeing the other side of the Scrivener world, and I'm sure your post will be a great help for many Windows users.
If you'd like to ask Sarah any questions about Scrivener for Windows, she's a gun with the answers. You can ask in the comments below, or contact her on Twitter, where her handle is @Sciley.